Wednesday, September 21, 2011

Giant Cream Puffs with Chocolate Frosting


One of the many advantages of baking at home is that when you make cream puffs...
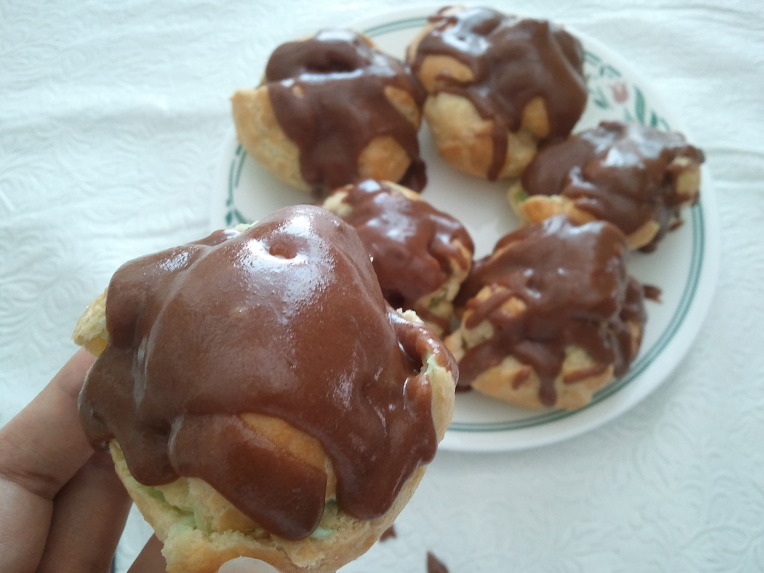
 YOU CAN STUFF IN AS MUCH FILLING AS YOU WANT!!
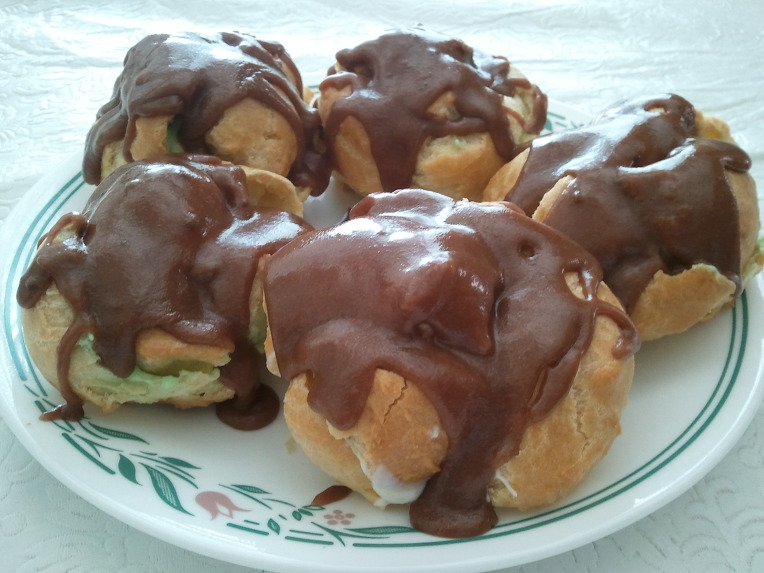
These cream puffs, filled with creamy pistachio pudding and frosted with sweet, sugary chocolate icing, were made simply to satisfy my own cravings:)
I didn't care how they looked, or how messy they got; I just wanted to gobble, gobble, gobble!
Although, I have to say, they look pretty scrummylicious to me;)
Overall, these were heavenly. The icing was a little too sweet for my taste, but then again, I used semisweet chocolate instead of unsweetened chocolate because that was all I had, which probably made a huge difference. Oh, and I also made some other healthy substitutions, so I didn't feel guilty at all.
I got this recipe a few months ago from my cooking teacher, and after we made them in class, everyone was licking the frosting and filling off their mixing bowls!
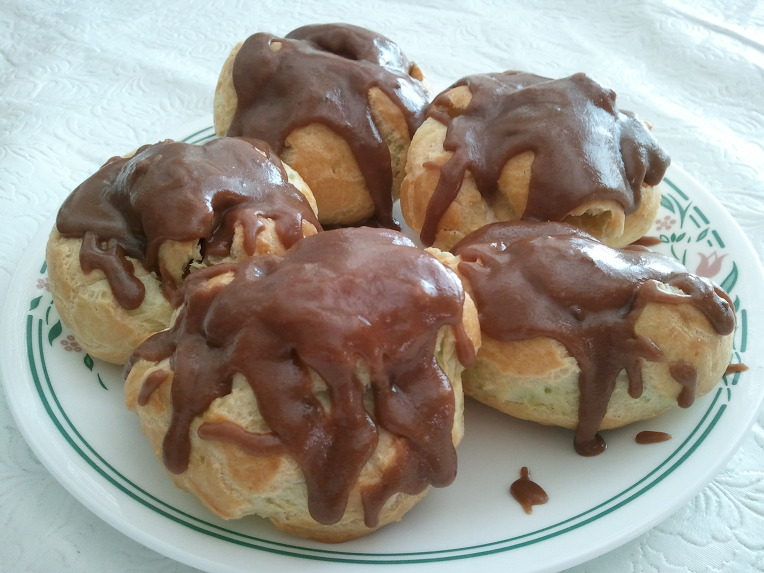


Giant Cream Puffs with Chocolate Frosting
recipe from my cooking teacher
makes 6
Ingredients:
For the Cream Puffs:
1/2 cup all purpose flour
1/4 cup butter
1/2 cup water
2 eggs
Dash of salt
1/2 tsp sugar, if desired

For the Filling:
One 4-serving box of Jell-O instant pudding and pie filling, any flavor
1 cup fat free milk
1 cup whipping cream (I used 2 cups fat free cool whip)

For the Frosting:
1 oz unsweetened chocolate
1 tsp butter
1 cup sifted powdered sugar
2 tbsp hot water

Directions:
For the cream puffs:
In a medium saucepan, combine water, butter, salt, and sugar, if desired. Bring to a boil. Add all the flour at once, stirring vigorously over low heat until the mixture forms a ball. Remove from heat; cool slightly. Beat in eggs one at a time, beating well after each addition. (The batter may look curdled, but this is normal, and it will become smooth in the end. No worries!) Drop by scant 1/4 cupfuls about 3 inches apart onto an ungreased cookie sheet. Bake on the lowest rack in a preheated 400F oven, until puffed and golden, about 30 minutes. Cool in the oven with door slightly open.
For the Filling:
Chill 2 bowls with beaters. Whip whipping cream in one bowl until stiff. In the other bowl, mix pudding mix and milk. Mix for only 1 minute at high speed. Fold the pudding and the whipped cream (or cool whip) together thoroughly. 
For the Frosting:
In a microwave, heat unsweetened chocolate and 1 tsp butter in a microwave safe bowl. Stir in sifted powdered sugar and hot water, 1 tbsp at a time. Beat until smooth.
To assemble:
Cut off the tops of the cooled puffs and pull out any soft dough. Save the tops. Fill puffs with filling, replace tops, and frost with chocolate frosting. Refrigerate until serving. 

Make ahead: Make the puffs, filling, and frosting, and keep refrigerated. The next day, crisp up the puffs, after pulling out the insides, in a preheated 350F oven for 5 minutes. Cool, then assemble.

Sunday, September 18, 2011

Moist Cocoa Brownies


I'm so into brownies these days. 
For the last few months, I've been obsessed with cakes covered in whipped cream, so I had them practically everyday. I'm still not over it, but two weeks ago, this amazing book of brownies caught my eye.
It was full of awesome bars, brownies, and blondies recipes, and I just HAD to buy it.
Plus it was on a clearance sale!
I've tried three of the recipes so far, and all of them turned out great.
This was my first brownie from the book, and it's moist and chocolatey, with some crunchiness from a handful of nuts; it's just like the classic, most basic brownies you can ever bake.


Moist Cocoa Brownies
Recipe very closely adapted from Good Housekeeping: Brownies
Makes 16 squares
Ingredients:
2 eggs
1/2 cup unsweetened cocoa powder
1 cup granulated sugar
1 cup chopped nuts (I used pecans)
1/2 cup all purpose flour
1/2 cup unsalted butter
1 teaspoon vanilla extract

Direction:
Preheat oven to 350F. 
Combine flour and cocoa powder in a medium bowl.
Melt butter in a small saucepan over low heat; remove from heat and stir in sugar. Once the sugar is dissolved, mix in eggs, then stir in vanilla extract. Stir in flour-cocoa mixture and mix until moistened. Stir in chopped nuts and pour batter into a 9-inch square pan lined with foil. Bake for 17 minutes, or until a toothpick inserted in the center comes out with a few moist crumbs. Cool in pan for 5 minutes, then on a wire rack, until completely cooled. Cut into 16 squares. You can dust some powdered sugar on top just before serving, but to me it tastes gorgeous even without it:)

Enjoy!


Tuesday, September 13, 2011

Mini Raspberry Heart Cakes


Have you ever tasted a chocolate cake and had an irresistible urge to gobble down the whole thing?
I have.
And it's this cake right here.
And you can't even go for the rest of the cake because it is "portion controlled".
Hmm.. I say this cake is good for your waistline.

It's incredibly moist and soft, it practically melts in your mouth. I actually made this for my mom, who recently had a dental surgery, so that she could enjoy her food without having to bite into it too hard.
Of course, she enjoyed it too, but she said that the doctor told her to avoid sweet stuff.
Oops...I forgot about that. Silly me:)
So I ended up eating the whole batch with my dad!

I got this recipe from the Hershey's website, which has the most amazing chocolate cake photos EVER. Once I start looking at all the chocolatey treats, I sit in front of my computer drooling at them for at least 3 hours. I had a very hard time choosing which one to make, so I chose one that didn't yield a lot of servings. Just to experiment. This one was a recipe for two, but I doubled it and made four lovely mini chocolate cakes:)


Chocolate Sweetheart Cakes for Two

Recipe from HERSHEY'S 
Ingredients:

For the Cake:
3/4 cup all-purpose flour
1/4 cup packed light brown sugar
1/2 teaspoon baking soda
1/2 cup water
1/2 teaspoon white vinegar
1/4 cup granulated sugar
3 tablespoons unsweetened cocoa powder
1/8 teaspoon salt
3 tablespoons vegetable oil
1/2 teaspoon vanilla extract

For the Chocolate Frosting:
1 tablespoon butter or margarine
2/3 cup powdered sugar
1 tablespoon unsweetened cocoa powder
2 to 3 teaspoons milk
1/8 teaspoon vanilla extract

Garnish:
4 raspberries
Fresh mint leaves
Caramel syrup (optional - I used smucker's sugar free caramel syrup)

Directions:
Heat oven to 350F. Grease and flour a 8-inch square baking pan.
Stir together flour, granulated sugar, brown sugar, cocoa powder, baking soda and salt in a medium bowl. Add water, oil, vanilla, and vinegar; beat with spoon or whisk until smooth. Pour batter into prepared pan.
Bake 18 to 20 minutes or until wooden pick inserted in the center comes out clean. Cool 10 minutes; remove from pan to wire rack. Cool completely. Transfer to cutting board. Using a 3-1/4-inch heart shaped cookie cutter, cut cake into 4 hearts. Spread chocolate frosting on top of two hearts. Press remaining hearts on top. Drizzle with caramel syrup, if desired, then garnish with raspberries and mint leaves.

For the Chocolate Frosting: Place butter in a small microwave safe bowl. Microwave at medium (50%) 20 seconds or until butter is melted. Stir together powdered sugar and cocoa; add to butter mixture alternately with milk, beating with spoon or whisk until smooth. Stir in vanilla. Makes about 1/3 cup frosting.


Sunday, September 11, 2011

About the Cinnaholic Baker...

I don't know where to start.
This is a very exciting moment for me, since I've always wanted to create my own blog about my baking experiences! Well... okay, this is my second blog about baking, but it's not quite the same. If you want to see my first blog, the link is right here -->http://blog.daum.net/rkddkwl0413
And you'll see why it's different.
I'm 16 and I've been baking since I was a little kid. I literally bake something everyday, and I hope to be a pastry chef when I'm older. I think my passion for baking comes from my mom, because she's the one who was obsessed with baking ever since she had me. She makes THE BEST pumpkin pies in the world, and even as I'm writing this, I can feel that indulgent taste in my mouth...


CINNAMON...


YUM...


Anyways, I have a few recipes that turn out gorgeously every time I make it, so I'll try to post most of them on my blog.
I don't have the best writing skills in the world, but I hope you enjoy my blog and accompany me on my baking journey:)