Showing posts with label cocoa. Show all posts

Thursday, March 15, 2012

The Best Red Velvet Cheesecake Cake ever.


I guess the red velvet trend is starting to die out now, but red velvet is still unquestionably many people's favorite flavor.
I'm not so sure that I would be able to recognize the taste of red velvet in a blind taste testing; maybe it's just the color that makes it alluring to our taste buds, as well as our eyes.
But seriously, there's like twenty red velvet recipes in my "to try" list because they all looked so tempting!
Red velvet whoopie pies, red velvet cookies, red velvet cupcakes, red velvet cake balls... you name it!
This one was the only recipe I've tried so far, and it's definitely an good start!
No, it's actually an AMAZING start.
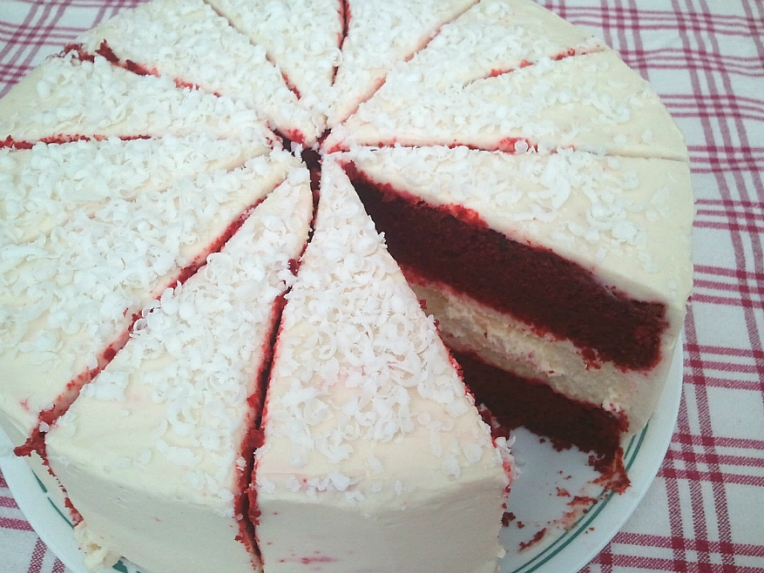
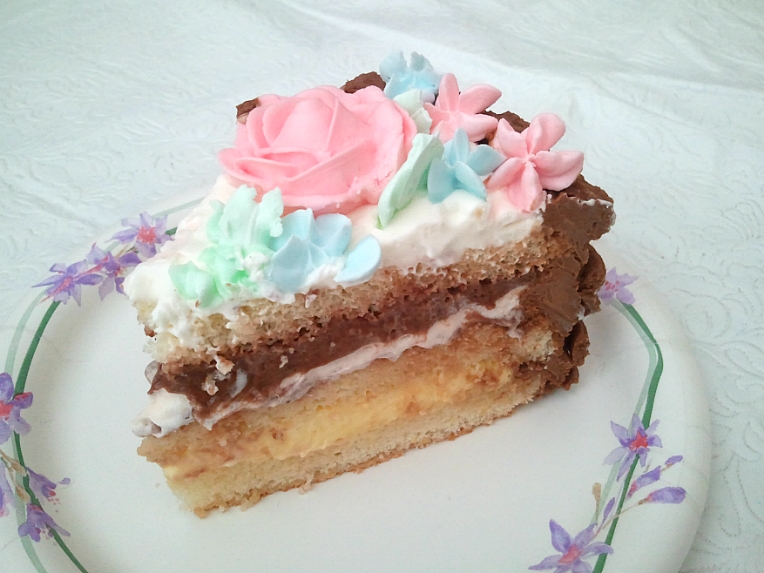
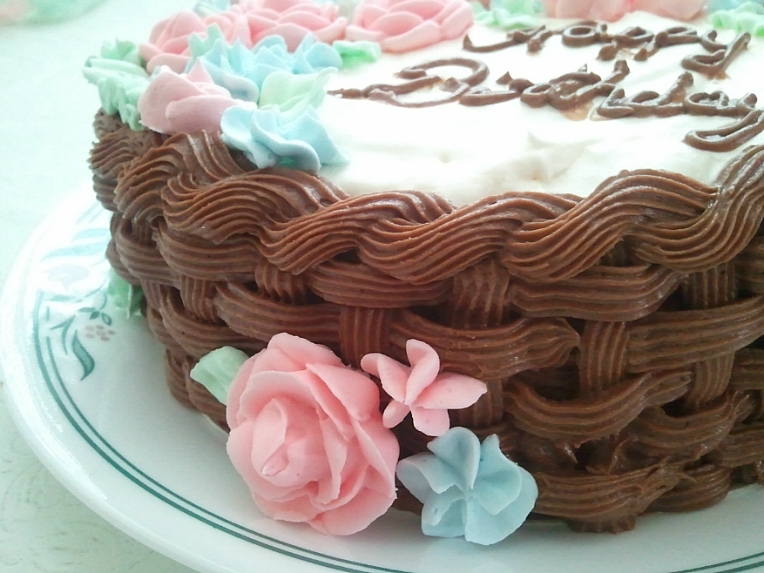
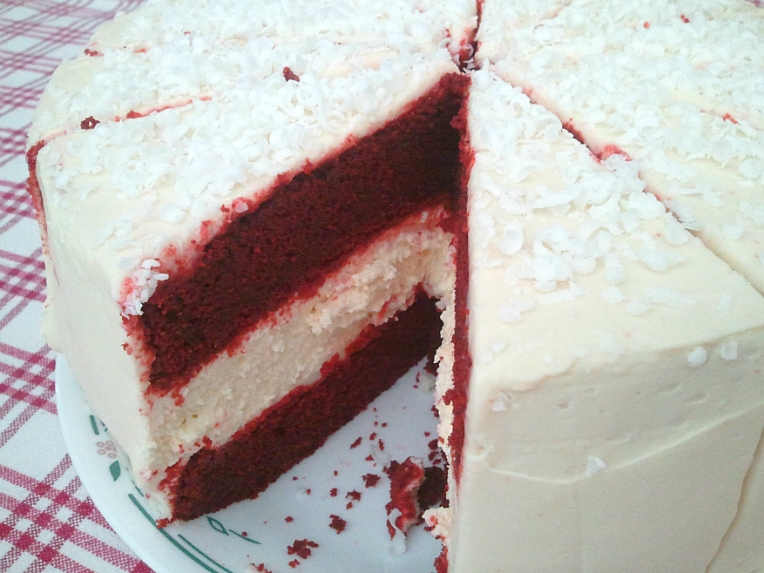
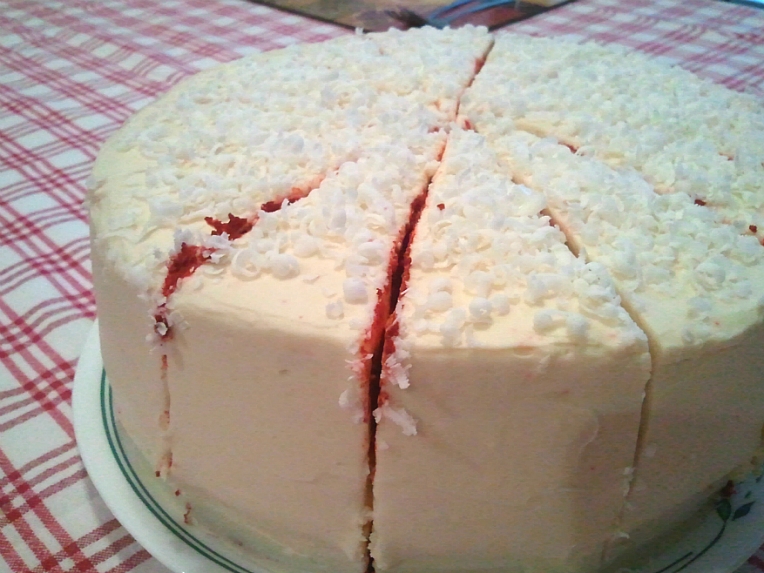
A whole layer of rich and creamy cheesecake stuffed inside two moist, thick, and delicious layers of red velvet cake.
Covered with decadent cream cheese frosting.
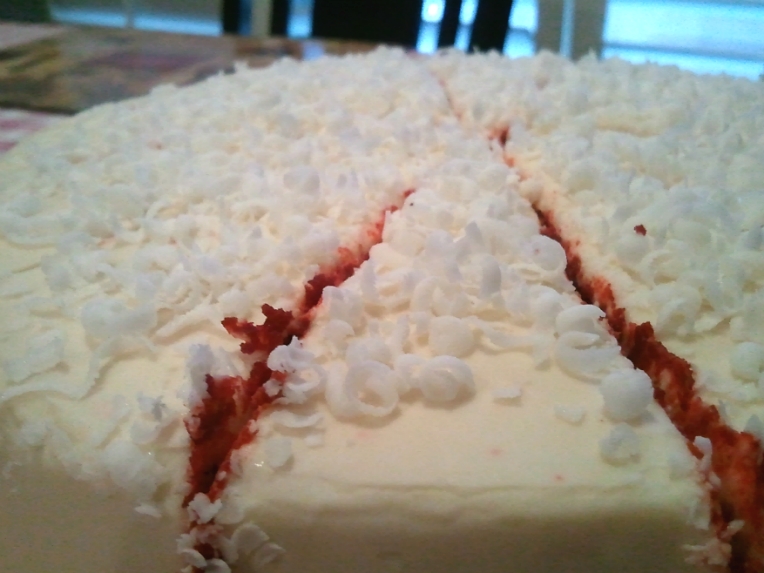
Topped with shavings of white chocolate love.

Mmm... what more could you ask for?


Red Velvet Cheesecake Cake
recipe adapted from recipegirl

Makes one amazing 9-inch 3-layer cake
Ingredients:
For the Cheesecake:
Two (8-ounce) packages cream cheese, at room temperature
2/3 cup granulated white sugar
pinch of salt
2 large eggs
1/3 cup sour cream
1/3 cup heavy whipping cream
1 teaspoon vanilla extract

For the Red Velvet Cake:
2 1/2 cups all purpose flour
1 1/2 cups granulated white sugar
3 tablespoons unsweetened cocoa powder (not Dutch process)
1 1/2 teaspoons baking soda
1 teaspoon salt
2 large eggs, at room temperature
1 cup melted butter
1/2 cup vegetable or canola oil
1 cup buttermilk
1/4 cup (two 1-ounce bottles) red food coloring
2 teaspoons vanilla extract
2 teaspoons white vinegar

For the Cream Cheese Frosting:
1 cup powdered sugar, sifted lightly to remove any lumps
Two (8-ounce) packages cream cheese, at room temperature
1/2 cup unsalted butter, at room temperature
1 tablespoon vanilla extract

Directions:
1. Prepare the cheesecake layer: Preheat oven to 325 degrees F. Place a large roasting pan on the lower third rack of the oven. Place a kettle of water on the stove to boil. Spray a 9-inch springform pan with nonstick spray and line the bottom with a round of parchment paper. Wrap a double layer of foil around the bottom and up the sides of the pan (you want to seal it so the water from the water bath doesn't seep into the pan). In a large bowl, use an electric mixer to mix the cream cheese- blend until it is nice and smooth and creamy. Mix in sugar and salt and blend for 2 minutes, scraping down sides of the bowl as needed. Add eggs, one at a time, blending after each addition. Finally, mix in sour cream, whipping cream and vanilla. Mix until smooth. Pour the batter into the prepared pan. Set the pan into the roasting pan in the pre-heated oven. Carefully pour the hot water from your kettle into the roasting pan (it will fill the pan surrounding the cheesecake). Pour enough water so that there is about an inch of water coming up the foil along the sides of the cheesecake pan. Bake the cheesecake for 45 minutes. It should be set to the touch and not jiggly. Remove the cheesecake from the roasting pan and let it cool on a wire rack for at least an hour. When it has cooled, place the pan into the freezer and let the cheesecake freeze completely. This can be done in several hours- or overnight.

2. Prepare the cake layers: Preheat oven to 350 degrees F. Grease and flour two 9-inch round metal baking pans (or spray with nonstick baking spray with flour). In a large bowl, whisk together flour, sugar, cocoa powder, baking soda and salt. Add eggs, melted butter, oil, buttermilk, food coloring, vanilla and vinegar to the flour mixture. Using an electric mixer on medium-low speed, beat for 1 minute, until blended. Scrape sides and bottom of bowl with a rubber spatula. Beat on high speed for 2 minutes. Spread the batter evenly into the prepared pans, dividing equally. Bake 25 to 30 minutes or until a toothpick inserted in the center comes out with a few moist crumbs attached. Let cool in pans on a wire rack for 10 minutes. Run a knife around the edge of the pans, then invert cakes onto a rack to cool completely.

3. Prepare the frosting: In a large bowl, using an electric mixer on medium-high speed, beat powdered sugar, cream cheese, butter and vanilla until it is smooth and creamy (do not overbeat).

4. Assemble the cake: Place one cake layer into the center of a cake plate or platter. Remove the cheesecake from the freezer, take off the sides of the pan, and slide a knife under the parchment to remove the cheesecake from the pan. Peel off the parchment. Measure your cheesecake layer against the cake layers. If the cheesecake layer turns out to be a slightly larger round than your cake, move it to a cutting board and gently shave off some of the exterior of the cheesecake to get it to the same size as your cake layers. Place the cheesecake layer on top of the first cake layer. Place the 2nd cake layer on top of the cheesecake.

5. Frost the cake: Apply a crumb coat layer to the cake- use a long, thin spatula to cover the cake completely with a thin and even layer of frosting. Be sure to wipe off your spatula each time you are about to dip it back into the bowl to get more frosting (this way you won't be transferring any red crumbs into the bowl of frosting). Don't worry at this point about the crumbs being visible in the frosting on the cake. When your cake has a thin layer of frosting all over it, place it into the refrigerator for 30 minutes to "set" the frosting. Once the first layer of frosting is set, apply the 2nd layer. Start by adding a large scoop of frosting onto the top of the cake. Use a long, thin spatula to spread the frosting evenly across the top and then spread it down the sides of the cake too. Because you applied a crumb-coat layer, you shouldn't have any red crumbs floating around in the final frosting layer. Decorate, as desired. I recommend white chocolate shavings (see *Tips below). Keep this cake refrigerated.

Tips:
*For making white chocolate shavings: Purchase a hunk of white chocolate. Microwave the chocolate to soften it up slightly (15 to 30 seconds, depending on the size). Use a potato peeler to run down the side of the chocolate to create shards/shaves/curls of white chocolate. I like to shave it onto a paper plater and then just use the plate to slide the chocolate onto the top of the cake.
*If you are serving this cake at a party, it's perfectly okay to leave the cake at room temperature for an hour or so while serving. Otherwise, keep it in the refrigerator. It also freezes perfectly! I made my cake one day and then just placed it as-is in the freezer and pulled it out the next day. It thaws quickly.
*The original recipe uses 2 1/2 cups powdered sugar for the frosting, but my family doesn't like crazy sweet stuff, so I reduced the amount drastically. 1 cup was still very sweet for us!


Sunday, October 9, 2011

Flower Cake with Chocolate Frosting


Tada!
My very first attempt at cake decorating!
I was shy and I always stuck to simple whipped cream when it came to frosting cakes, but I guess it was about time I'd tried something new.
So I made some royal icing and buttercream and used them both on this beautiful flower-covered cake!

Today was my mom's birthday, so I made a full course dinner for her (well, technically, we had it for breakfast. Yup, at 8am in the morning.) including an appetizer, an entree with two sides, and a dessert :)

So the menu was:
~*~
Appetizer - Korean rolled omelettes
Entree - Braised beef eye of round steak with BBQ sauce
Side - Garlic mashed potatoes
- Oriental salad
Dessert - Flower cake with chocolate frosting
~*~


Wow... the main dish just looks like a big lump of 'stuff'.
I wasn't too happy with the beef because the sauce turned out a little too sweet, but overall, I was proud of my special gift for my mom:)

Especially the cake.
OMG, the cake.
It was the best thing on the menu.
Sinfully delicious and divine. That's what it was.
The chocolate buttercream was perfectly creamy and rich, and the cake layers were very moist and tender. 
And the filling was...
Okay, I cheated a little and used pudding mix and cool whip for the filling, but I was so busy cooking and baking yesterday that I just didn't have the time to make bavarian cream.
Anyway, it was a wonderful cake, and the flowers were of just the right sweetness too.
I'm planning to make this cake again for my dad's birthday, but with different decorations!    


Flower Cake with Chocolate Frosting
makes 4-layered 8-inch cake
Recipe adapted from makinglifedelicious(sponge cake) & Wilton(buttercream)
Ingredients:
For the Cake:
5 egg yolks
5 egg whites
1 1/2 cups granulated sugar
1 1/4 cups cake flour, sifted
1 teaspoon vanilla extract

For the Rum Syrup:
1/4 cup water
2 tablespoon light corn syrup
2 tablespoon rum

For the Filling:
1 pkg vanilla instant pudding mix
1 1/4 cups fat free milk
3 tablespoons cool whip

1 pkg chocolate instant pudding mix
1 1/4 cups fat free milk
3 tablespoons cool whip

2 cups cool whip

For the Chocolate Buttercream:
1/3 cup water
2 tablespoons meringue powder
1 (1 lb) box powdered sugar, sifted
10 tablespoons Crisco shortening
2 oz semisweet chocolate, melted
1/3 cup unsweetened cocoa
5 tablespoons light corn syrup
1/2 teaspoon vanilla extract
1/4 teaspoon almond extract
1/4 teaspoon butter flavor
1/4 teaspoon salt

For the Royal Icing:
1 tablespoon meringue powder
1 1/4 cup powdered sugar, measured before sifting
2 tablespoons water
Few drops of food coloring (any color)

Directions:
You might want to make the royal icing flowers several days before making the cake, because they need time to dry.

For the Cake:
Preheat oven to 375F. Grease and flour two 8-inch cake pans.
Beat egg yolks and sugar in a large mixing bowl until lemon colored. (They will look crumbly, like they're never gonna mix, but don't freak out like I did; they will look better later on!) 
In another bowl, beat egg whites until stiff but not dry. Fold half of the egg whites into the egg yolk mixture. Sift flour over the mixture and fold very gently until just incorporated, then add the remaining egg whites and gold, again, until just incorporated. Be very, very gentle, and try to mix them in quickly but thoroughly, until you have no more white streaks.
Pour the batter into the prepared pans and bake in a preheated oven for 20-25 minutes, or until a toothpick inserted in center comes out clean. (I baked them for 22 minutes and the sides came out a little hard)
Remove cakes from the oven and turn out of pans onto wire racks to cool completely.

You can do that, or you can wrap them tightly with plastic wrap when they are warm and put them in the freezer to lock in the moisture. I read about this method in a blog once and I use it whenever I feel like I overbaked the cakes just a tad. Once they cool down, take it out of the freezer and let it become room temperature.

For the Rum Syrup:
I know you're supposed to boil water and sugar first and then add the rum, but I didn't have time for that.
I simply combined water, corn syrup, a splash of rum, and called it a syrup:)

For the Filling:
The ingredients kinda speak for themselves. Mix the vanilla pudding mix with fat free milk, as directed on the box, let it set, then stir in the cool whip. Do the same with the chocolate pudding mix. Refrigerate until use.

For the Chocolate Buttercream:
Combine water and meringue powder. Whip at high speed until peaks form. Sift in 1 cup of powdered sugar into the mixture, 1/2 cup at a time, beating at low speed after each addition. Alternately add shortening and remaining sugar. Add cocoa powder, melted chocolate, and corn syrup. Add salt and flavorings. Beat at low speed until smooth.

To Assemble:
Cut off the tops of each cake to make them flat. Slice them horizontally in half to make four cake layers.
Put one layer in an 8-inch cake ring. Sprinkle with rum syrup. Pipe the chocolate buttercream around the cake with a round or star tip so that the filling doesn't ooze out. Fill in with vanilla filling. 
Top with a second cake layer, sprinkle with rum syrup, pipe a buttercream border, and fill in with cool whip. Reserve some for the very top.
Top with a third cake layer, sprinkle with rum syrup, pipe a buttercream border, and fill in with chocolate filling.
Top with the last cake layer, then spread the top with remaining cool whip. Coat the sides thinly with chocolate buttercream.
Using a basketweave tip (#47), make basketweave designs on the side. Then, using a star tip (#21), make rope borders around the top of the cake. (Click on the links for detailed how-to's.)
Pipe a message on top with the remaining frosting, using a round tip (#3).
My 'Happy Birthday' message kinda soaked into the cool whip and made a smudgy mess; I don't know why that happened.

For the Royal Icing:
Beat all ingredients until icing forms peaks (7-10 minutes at low speed with a heavy-duty mixer, 10-12 minutes at high speed with a hand-held mixer). For stiffer icing, use 1 teaspoon less water. Add 1-2 drops of desired food coloring. Fill a decorating bag with icing and pipe flowers, leaves, whatever you want, on a piece of parchment paper, and let it dry completely for 1-2 days, more if the flowers are big.
Here are the instructions for the roses, star drop flowers, and leaves.
When they become candy-hard, decorate the cake!


Sunday, September 18, 2011

Moist Cocoa Brownies


I'm so into brownies these days. 
For the last few months, I've been obsessed with cakes covered in whipped cream, so I had them practically everyday. I'm still not over it, but two weeks ago, this amazing book of brownies caught my eye.
It was full of awesome bars, brownies, and blondies recipes, and I just HAD to buy it.
Plus it was on a clearance sale!
I've tried three of the recipes so far, and all of them turned out great.
This was my first brownie from the book, and it's moist and chocolatey, with some crunchiness from a handful of nuts; it's just like the classic, most basic brownies you can ever bake.


Moist Cocoa Brownies
Recipe very closely adapted from Good Housekeeping: Brownies
Makes 16 squares
Ingredients:
2 eggs
1/2 cup unsweetened cocoa powder
1 cup granulated sugar
1 cup chopped nuts (I used pecans)
1/2 cup all purpose flour
1/2 cup unsalted butter
1 teaspoon vanilla extract

Direction:
Preheat oven to 350F. 
Combine flour and cocoa powder in a medium bowl.
Melt butter in a small saucepan over low heat; remove from heat and stir in sugar. Once the sugar is dissolved, mix in eggs, then stir in vanilla extract. Stir in flour-cocoa mixture and mix until moistened. Stir in chopped nuts and pour batter into a 9-inch square pan lined with foil. Bake for 17 minutes, or until a toothpick inserted in the center comes out with a few moist crumbs. Cool in pan for 5 minutes, then on a wire rack, until completely cooled. Cut into 16 squares. You can dust some powdered sugar on top just before serving, but to me it tastes gorgeous even without it:)

Enjoy!


Tuesday, September 13, 2011

Mini Raspberry Heart Cakes


Have you ever tasted a chocolate cake and had an irresistible urge to gobble down the whole thing?
I have.
And it's this cake right here.
And you can't even go for the rest of the cake because it is "portion controlled".
Hmm.. I say this cake is good for your waistline.

It's incredibly moist and soft, it practically melts in your mouth. I actually made this for my mom, who recently had a dental surgery, so that she could enjoy her food without having to bite into it too hard.
Of course, she enjoyed it too, but she said that the doctor told her to avoid sweet stuff.
Oops...I forgot about that. Silly me:)
So I ended up eating the whole batch with my dad!

I got this recipe from the Hershey's website, which has the most amazing chocolate cake photos EVER. Once I start looking at all the chocolatey treats, I sit in front of my computer drooling at them for at least 3 hours. I had a very hard time choosing which one to make, so I chose one that didn't yield a lot of servings. Just to experiment. This one was a recipe for two, but I doubled it and made four lovely mini chocolate cakes:)


Chocolate Sweetheart Cakes for Two

Recipe from HERSHEY'S 
Ingredients:

For the Cake:
3/4 cup all-purpose flour
1/4 cup packed light brown sugar
1/2 teaspoon baking soda
1/2 cup water
1/2 teaspoon white vinegar
1/4 cup granulated sugar
3 tablespoons unsweetened cocoa powder
1/8 teaspoon salt
3 tablespoons vegetable oil
1/2 teaspoon vanilla extract

For the Chocolate Frosting:
1 tablespoon butter or margarine
2/3 cup powdered sugar
1 tablespoon unsweetened cocoa powder
2 to 3 teaspoons milk
1/8 teaspoon vanilla extract

Garnish:
4 raspberries
Fresh mint leaves
Caramel syrup (optional - I used smucker's sugar free caramel syrup)

Directions:
Heat oven to 350F. Grease and flour a 8-inch square baking pan.
Stir together flour, granulated sugar, brown sugar, cocoa powder, baking soda and salt in a medium bowl. Add water, oil, vanilla, and vinegar; beat with spoon or whisk until smooth. Pour batter into prepared pan.
Bake 18 to 20 minutes or until wooden pick inserted in the center comes out clean. Cool 10 minutes; remove from pan to wire rack. Cool completely. Transfer to cutting board. Using a 3-1/4-inch heart shaped cookie cutter, cut cake into 4 hearts. Spread chocolate frosting on top of two hearts. Press remaining hearts on top. Drizzle with caramel syrup, if desired, then garnish with raspberries and mint leaves.

For the Chocolate Frosting: Place butter in a small microwave safe bowl. Microwave at medium (50%) 20 seconds or until butter is melted. Stir together powdered sugar and cocoa; add to butter mixture alternately with milk, beating with spoon or whisk until smooth. Stir in vanilla. Makes about 1/3 cup frosting.