Monday, March 19, 2012

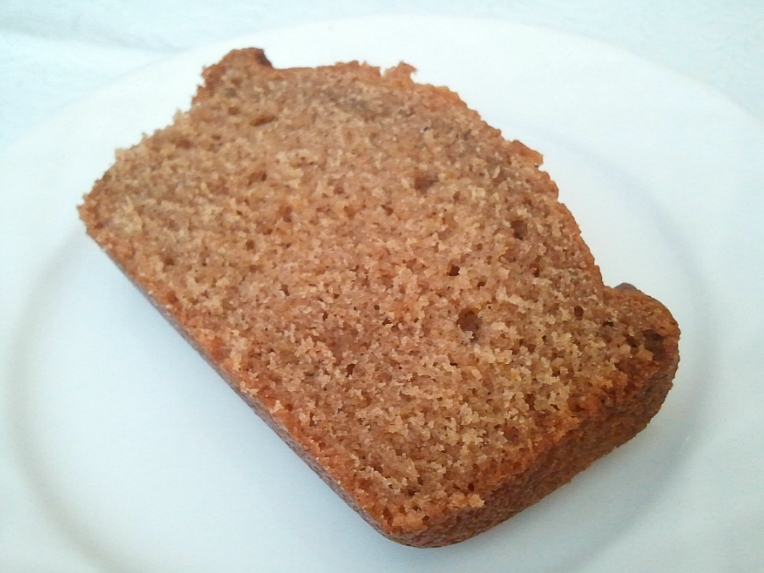
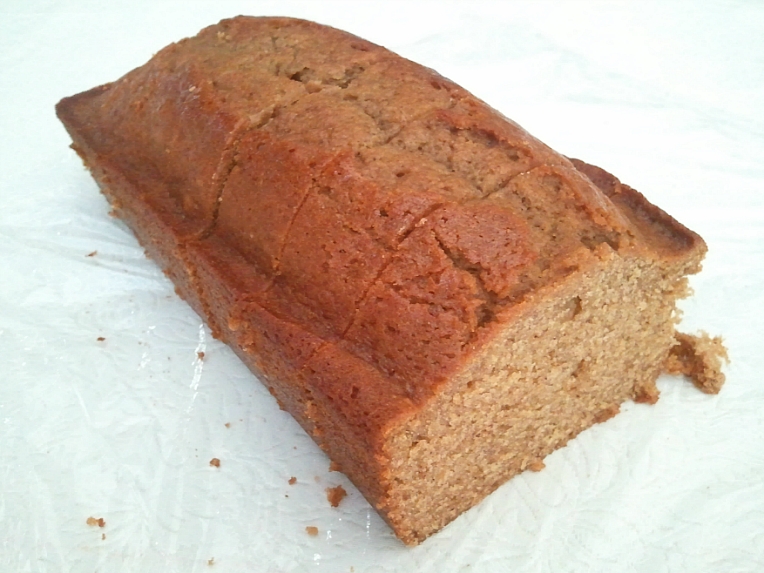
Super Moist Honey Cake


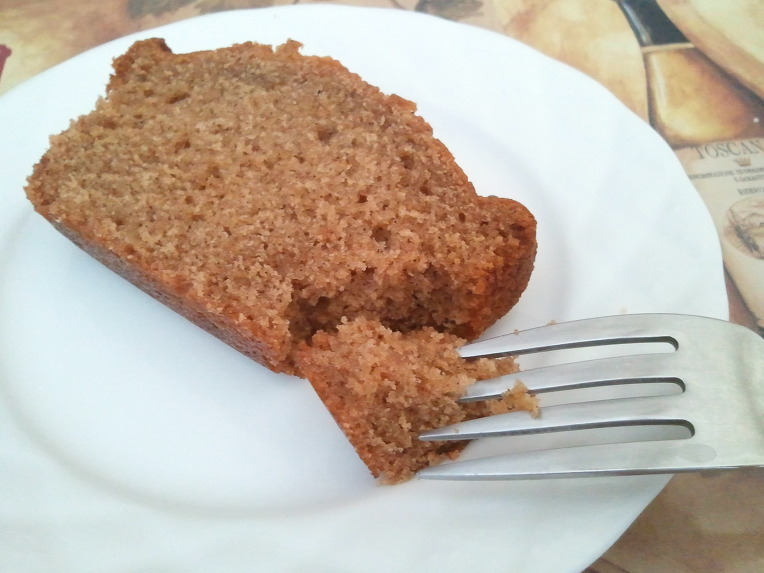
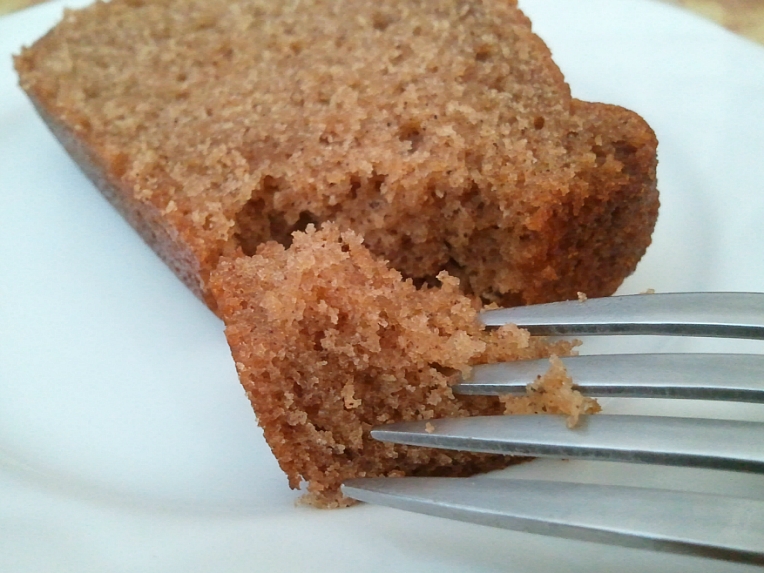
Here's a super moist cake for you all.
It's actually a quick bread, but it is extra moist and tender, almost like a cupcake:)
As soon as I saw this recipe, I knew I had to make it.
It's not the prettiest thing in the world, but I can tell you that you'll want to bake it over and over again!
Basically, it's a spice cake, but with a surprise of a distinctive honey flavor.
The honey taste is definitely there, which is perfect for me because I adore honey.
I was planning to have these with a drizzle of honey, but I don't even think that was necessary!
These are perfect for breakfast, a quick snack, or even as a dessert.


Super Moist Honey Cake
makes one 9x5" loaf
Recipe adapted from SmittenKitchen
Ingredients*
1 cup plus 2 1/2 tablespoons all purpose flour
1 teaspoon baking powder
1/3 teaspoon baking soda
1/6 teaspoon salt
2 teaspoons cinnamon
1/6 teaspoon ground cloves
1/6 teaspoons ground nutmeg
1/3 cup olive oil
1/3 cup honey
1/2 cup granulated sugar
1/6 cup (2 tablespoons plus 2 teaspoons) brown sugar
1 egg, room temperature
1/3 teaspoon vanilla extract
1/3 cup warm coffee
1/6 cup (2 tablespoons plus 2 teaspoons) fresh orange juice
1 tablespoon plus 1 teaspoon rye or whiskey ( I just used water - worked fine!)

Directions:
Preheat oven to 350F.
Generously grease 9x5" loaf pan with baking spray.
In a medium bowl, combine the flour, baking powder, baking soda, salt, cinnamon, cloves and nutmeg. Make a well in the center and add oil, honey, both the sugars, eggs, vanilla, coffee, orange juice, and ryr or whiskey (or water). I have learnt from this recipe that if you meaure the oil first, then the honey, the honey will slide out beautifully without leaving any sticky bits behind! With an electric mixer on low speed, stir together all the ingredients until well combined. Pour batter into the prepared pan. Bake until the cake springs back when you gently touch the center, about 45 to 55 minutes. Let the cake stand for 15 minutes before removing from pan.

*I know the ingredients measurements are a little strange, and that's because I divided the original recipe by three! If you want to, you can bake 3 loaves with the following amounts:
3 1/2 cups all purpose flour
1 tablespoon baking powder
1 teaspoon baking soda
1/2 teaspoon salt
4 teaspoons cinnamon
1/2 teaspoon ground cloves
1/2 teaspoon ground nutmeg
1 cup olive oil
1 cup honey
1 1/2 cups granulated sugar
1/2 cup brown sugar
3 eggs, room temperature
1 teaspoon vanilla extract
1/2 cup fresh orange juice
1/4 cup rye or whiskey


Sunday, March 18, 2012

Giant Chocolate Chip Cookies


What makes an ordinary chocolate chip cookie extra special?
I think it's the size.
Chocolate chip cookies are a classic favorite for all those cookie-lovers, but you have to admit: they can get a little boring sometimes. 
NOT that I would ever say no to anyone who offers me one. :)
But a little twist and a little surprise are always fun to find in those little babies.
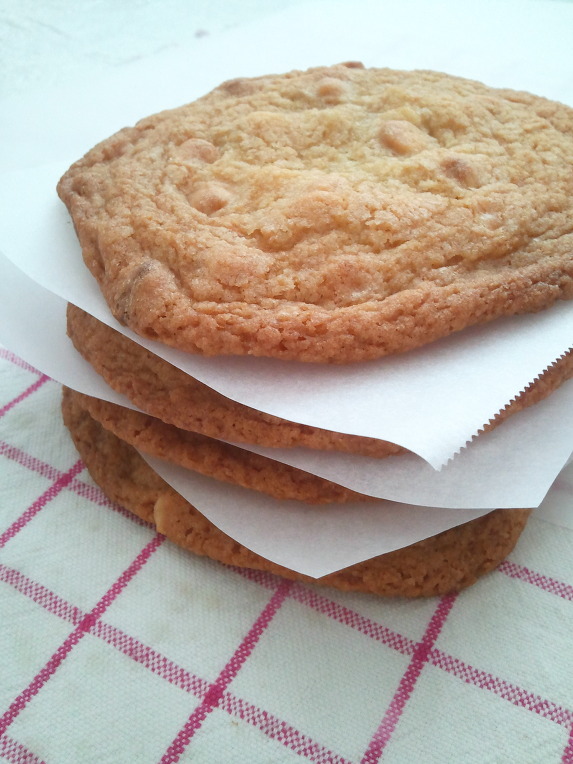
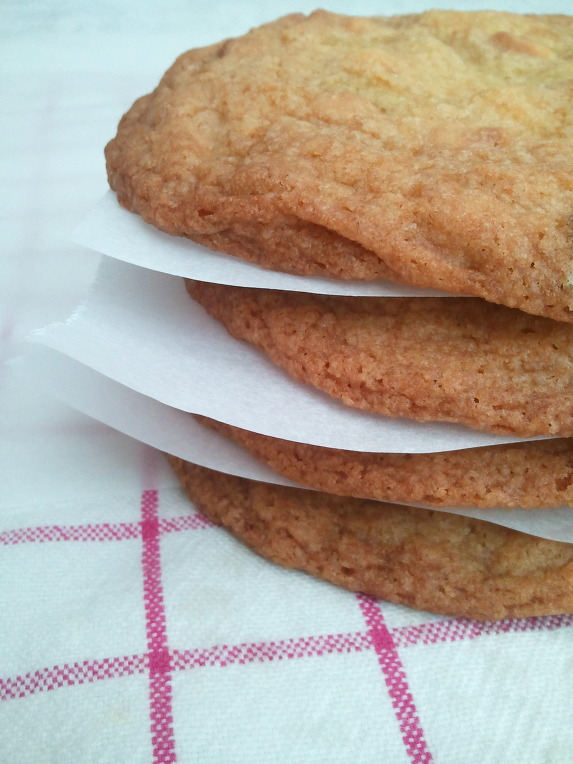
Or in this case, HUGE babies!
These are actually white chocolate macadamia cookies, but you can omit the nuts and just use semi-sweet or milk chocolate chips if you'd like. It's pretty easy to adjust to your taste.
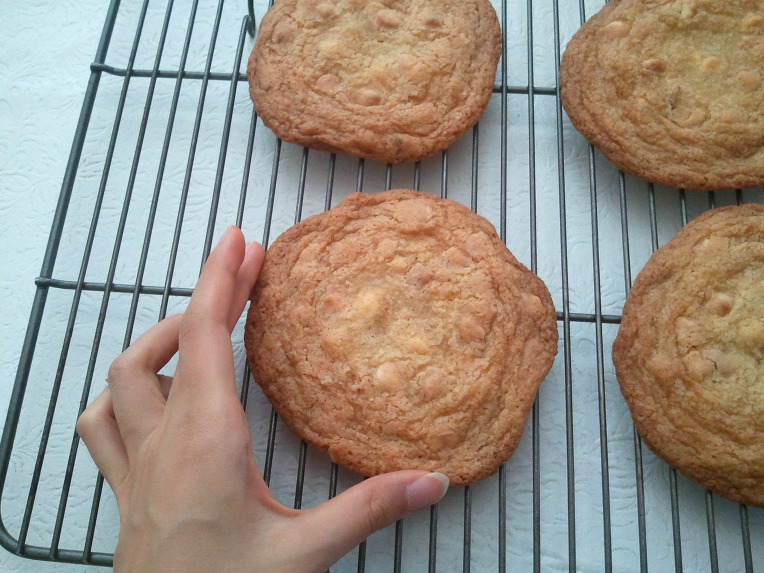
The one thing you MUST follow, of course, is the extra special size! 
(They are about 5" in diameter)
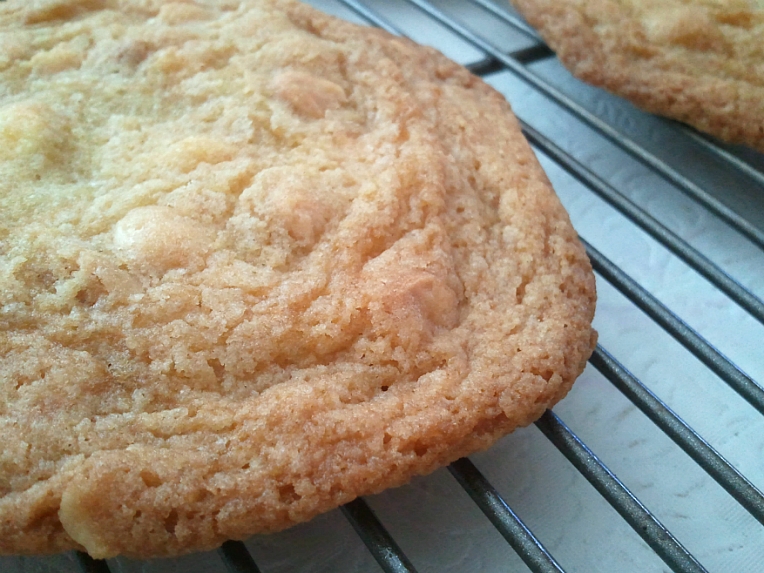
The edges are perfectly crisp, the center is soft, moist, and chewy, and every bite has a satisfying crunch from the nuts, and an irresistible, smooth, meltiness from the chocolate chips.
I guarantee that this perfectly sweet treats will be a "big" hit among the kids!


Giant Chocolate Chip Cookies
makes 8 (5-inch) cookies
Recipe adapted from Martha Stewart
Ingredients:
1 cup all purpose flour, spooned and leveled
3/4 teaspoons baking soda
1/2 teaspoon salt
1/2 cup unsalted butter
1/2 cup granulated sugar
6 tablespoons packed light brown sugar
1 egg
1 teaspoon vanilla extract
1/4 cup chocolate chips
1/4 cup chopped macadamia nuts

Directions:
Preheat oven to 375F. Line a cookie sheet with parchment paper.
In a medium bowl, whisk flour, baking soda, and salt. Set aside.
In a large bowl, with an electric mixer fitted with the paddle attachment, beat butter and sugars until light and fluffy. Add egg and beat well. Mix in vanilla.
Reduce speed to low and add in flour mixture; mix until just combined. Stir in the chocolate chips and nuts.
Drop by 1/4 cupfuls onto the cookie sheet, at least 4-inches apart from eachother. Bake until golden, 15 to 18 minutes. Cool 1 or 2 minutes on cookie sheets before transferring the cookies to a wire rack to cool completely.


See how wonderfully huge that is?


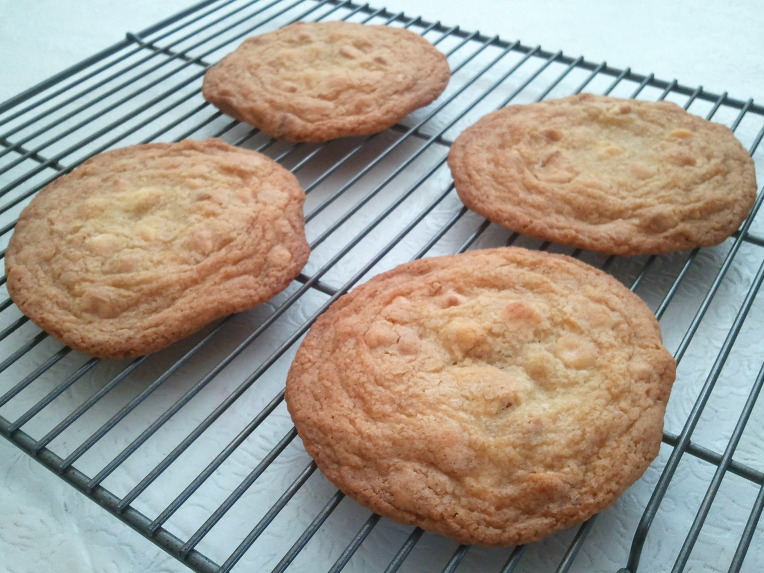
I made half the recipe and got four cookies - perfect for my family!
And yes, I used half an egg.


What's your way of making cookies special?


Thursday, March 15, 2012

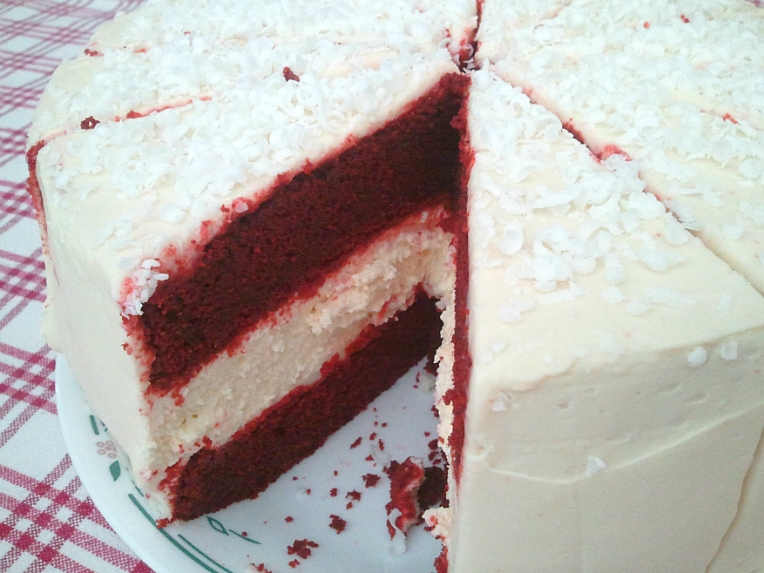
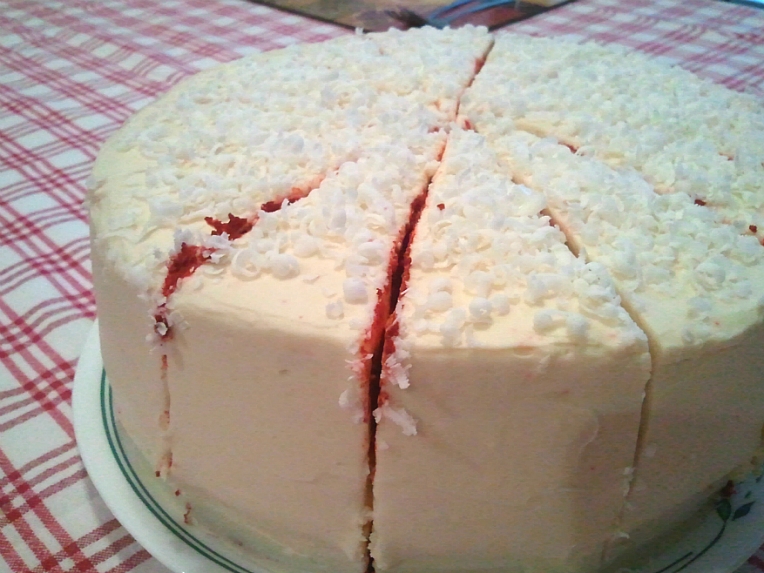
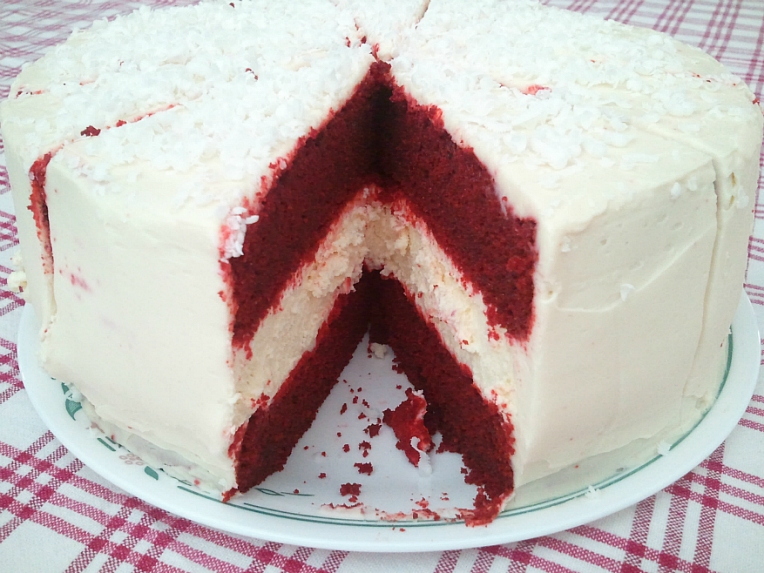
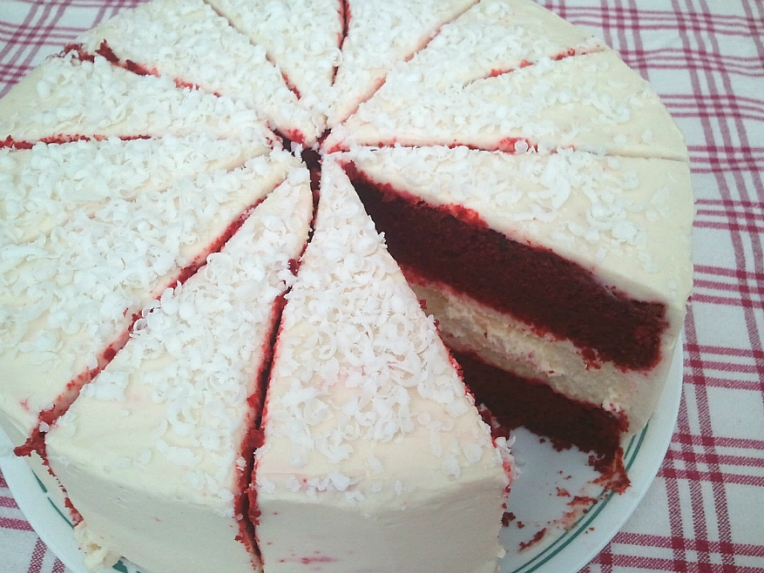
The Best Red Velvet Cheesecake Cake ever.


I guess the red velvet trend is starting to die out now, but red velvet is still unquestionably many people's favorite flavor.
I'm not so sure that I would be able to recognize the taste of red velvet in a blind taste testing; maybe it's just the color that makes it alluring to our taste buds, as well as our eyes.
But seriously, there's like twenty red velvet recipes in my "to try" list because they all looked so tempting!
Red velvet whoopie pies, red velvet cookies, red velvet cupcakes, red velvet cake balls... you name it!
This one was the only recipe I've tried so far, and it's definitely an good start!
No, it's actually an AMAZING start.
A whole layer of rich and creamy cheesecake stuffed inside two moist, thick, and delicious layers of red velvet cake.
Covered with decadent cream cheese frosting.
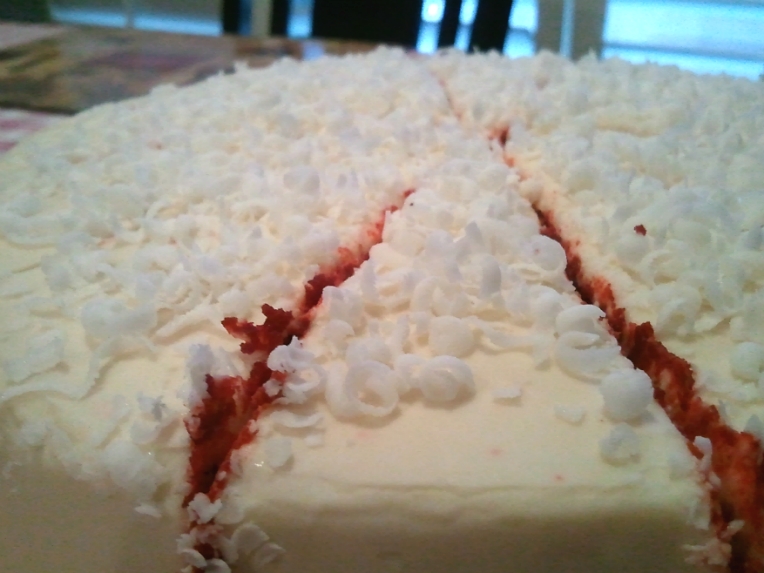
Topped with shavings of white chocolate love.

Mmm... what more could you ask for?


Red Velvet Cheesecake Cake
recipe adapted from recipegirl

Makes one amazing 9-inch 3-layer cake
Ingredients:
For the Cheesecake:
Two (8-ounce) packages cream cheese, at room temperature
2/3 cup granulated white sugar
pinch of salt
2 large eggs
1/3 cup sour cream
1/3 cup heavy whipping cream
1 teaspoon vanilla extract

For the Red Velvet Cake:
2 1/2 cups all purpose flour
1 1/2 cups granulated white sugar
3 tablespoons unsweetened cocoa powder (not Dutch process)
1 1/2 teaspoons baking soda
1 teaspoon salt
2 large eggs, at room temperature
1 cup melted butter
1/2 cup vegetable or canola oil
1 cup buttermilk
1/4 cup (two 1-ounce bottles) red food coloring
2 teaspoons vanilla extract
2 teaspoons white vinegar

For the Cream Cheese Frosting:
1 cup powdered sugar, sifted lightly to remove any lumps
Two (8-ounce) packages cream cheese, at room temperature
1/2 cup unsalted butter, at room temperature
1 tablespoon vanilla extract

Directions:
1. Prepare the cheesecake layer: Preheat oven to 325 degrees F. Place a large roasting pan on the lower third rack of the oven. Place a kettle of water on the stove to boil. Spray a 9-inch springform pan with nonstick spray and line the bottom with a round of parchment paper. Wrap a double layer of foil around the bottom and up the sides of the pan (you want to seal it so the water from the water bath doesn't seep into the pan). In a large bowl, use an electric mixer to mix the cream cheese- blend until it is nice and smooth and creamy. Mix in sugar and salt and blend for 2 minutes, scraping down sides of the bowl as needed. Add eggs, one at a time, blending after each addition. Finally, mix in sour cream, whipping cream and vanilla. Mix until smooth. Pour the batter into the prepared pan. Set the pan into the roasting pan in the pre-heated oven. Carefully pour the hot water from your kettle into the roasting pan (it will fill the pan surrounding the cheesecake). Pour enough water so that there is about an inch of water coming up the foil along the sides of the cheesecake pan. Bake the cheesecake for 45 minutes. It should be set to the touch and not jiggly. Remove the cheesecake from the roasting pan and let it cool on a wire rack for at least an hour. When it has cooled, place the pan into the freezer and let the cheesecake freeze completely. This can be done in several hours- or overnight.

2. Prepare the cake layers: Preheat oven to 350 degrees F. Grease and flour two 9-inch round metal baking pans (or spray with nonstick baking spray with flour). In a large bowl, whisk together flour, sugar, cocoa powder, baking soda and salt. Add eggs, melted butter, oil, buttermilk, food coloring, vanilla and vinegar to the flour mixture. Using an electric mixer on medium-low speed, beat for 1 minute, until blended. Scrape sides and bottom of bowl with a rubber spatula. Beat on high speed for 2 minutes. Spread the batter evenly into the prepared pans, dividing equally. Bake 25 to 30 minutes or until a toothpick inserted in the center comes out with a few moist crumbs attached. Let cool in pans on a wire rack for 10 minutes. Run a knife around the edge of the pans, then invert cakes onto a rack to cool completely.

3. Prepare the frosting: In a large bowl, using an electric mixer on medium-high speed, beat powdered sugar, cream cheese, butter and vanilla until it is smooth and creamy (do not overbeat).

4. Assemble the cake: Place one cake layer into the center of a cake plate or platter. Remove the cheesecake from the freezer, take off the sides of the pan, and slide a knife under the parchment to remove the cheesecake from the pan. Peel off the parchment. Measure your cheesecake layer against the cake layers. If the cheesecake layer turns out to be a slightly larger round than your cake, move it to a cutting board and gently shave off some of the exterior of the cheesecake to get it to the same size as your cake layers. Place the cheesecake layer on top of the first cake layer. Place the 2nd cake layer on top of the cheesecake.

5. Frost the cake: Apply a crumb coat layer to the cake- use a long, thin spatula to cover the cake completely with a thin and even layer of frosting. Be sure to wipe off your spatula each time you are about to dip it back into the bowl to get more frosting (this way you won't be transferring any red crumbs into the bowl of frosting). Don't worry at this point about the crumbs being visible in the frosting on the cake. When your cake has a thin layer of frosting all over it, place it into the refrigerator for 30 minutes to "set" the frosting. Once the first layer of frosting is set, apply the 2nd layer. Start by adding a large scoop of frosting onto the top of the cake. Use a long, thin spatula to spread the frosting evenly across the top and then spread it down the sides of the cake too. Because you applied a crumb-coat layer, you shouldn't have any red crumbs floating around in the final frosting layer. Decorate, as desired. I recommend white chocolate shavings (see *Tips below). Keep this cake refrigerated.

Tips:
*For making white chocolate shavings: Purchase a hunk of white chocolate. Microwave the chocolate to soften it up slightly (15 to 30 seconds, depending on the size). Use a potato peeler to run down the side of the chocolate to create shards/shaves/curls of white chocolate. I like to shave it onto a paper plater and then just use the plate to slide the chocolate onto the top of the cake.
*If you are serving this cake at a party, it's perfectly okay to leave the cake at room temperature for an hour or so while serving. Otherwise, keep it in the refrigerator. It also freezes perfectly! I made my cake one day and then just placed it as-is in the freezer and pulled it out the next day. It thaws quickly.
*The original recipe uses 2 1/2 cups powdered sugar for the frosting, but my family doesn't like crazy sweet stuff, so I reduced the amount drastically. 1 cup was still very sweet for us!


Tuesday, March 13, 2012

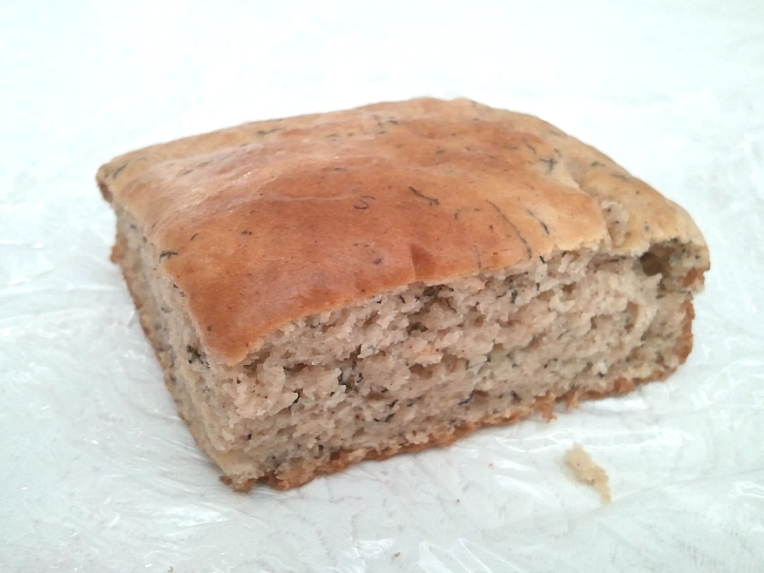
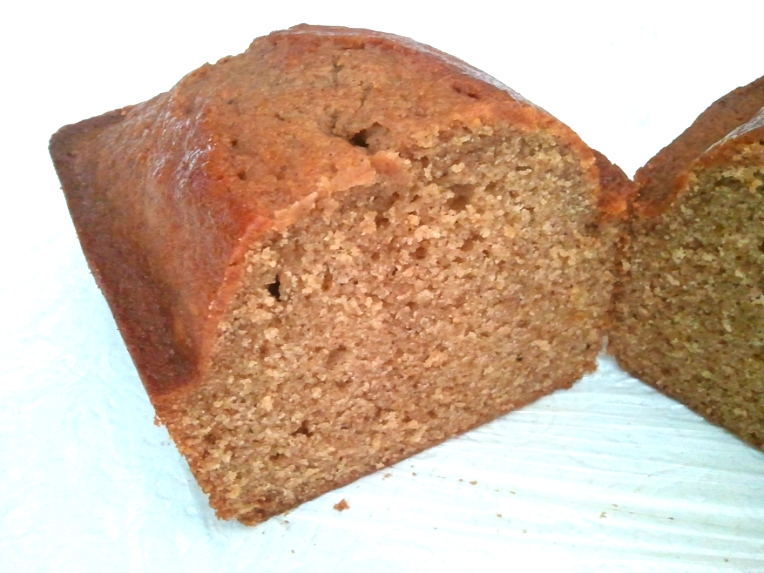
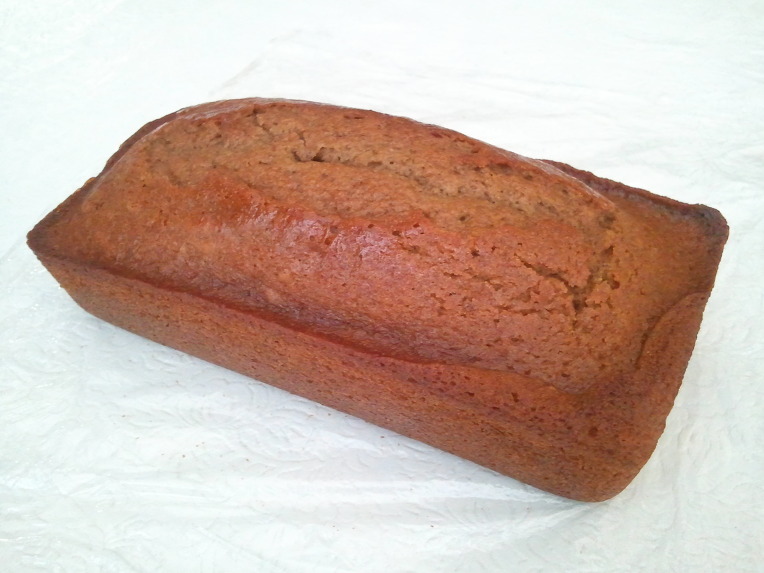
Super moist banana snack cake


I don't usually make the same recipe more than once, because I like variety, but this is one of the very, very, few recipes that I call my "go-to" recipe. 
These are bomb.
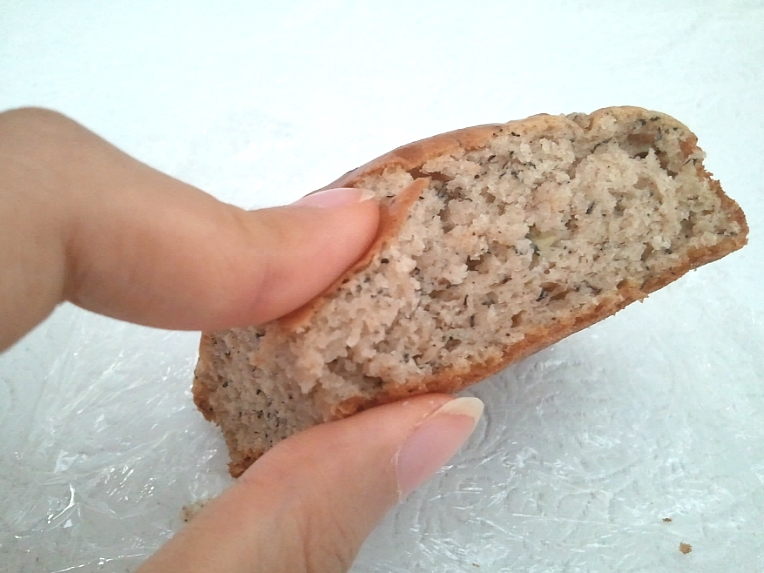
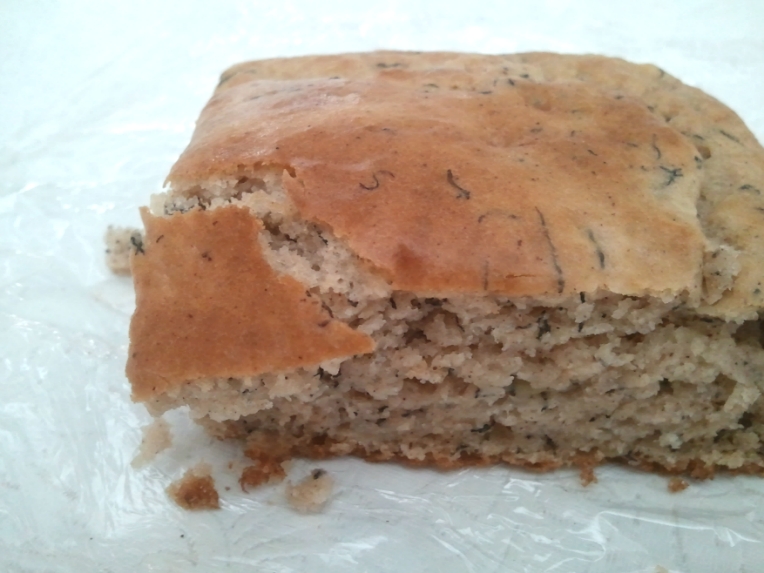
They are the most tender banana breads you will ever have.
So tender that I called it a cake rather than a bread.
They have a wonderful, deep banana flavor, and literally, they MELT IN YOUR MOUTH.
Oh, and you wanna know something even better?
They freeze beautifully.
Simply wrap each piece in plastic wrap, freeze 'em, and thaw in the refrigerator when you feel like snacking! 
20 seconds in the microwave is all it takes for a "freshly baked" banana cake :)


Super Moist Banana Snack Cake
recipe from Cooking light
serves 12
Ingredients:
6 3/4 oz all-purpose flour (about 1 1/2 cups - spooned and leveled)
1/3 cup sugar
1 tsp baking powder
1 tsp baking soda
1 tsp ground cinnamon
1/4 tsp salt
1 cup plain low-fat yogurt
3/4 cup mashed ripe banana (about 1 1/2 medium bananas)
1/4 cup vegetable oil (I used safflower)
1 large egg, lightly beaten.
cooking spray
1/2 cup cool whip (optional)

Directions:
Preheat oven to 375F.
Combine flour, sugar, baking powder, baking soda, cinnamon, and salt in a large bowl; stir with a whisk.
In a small bowl, combine yogurt, banana, oil, vanilla and egg; stir until well blended. Add yogurt mixture to the flour mixture in the large bowl, stirring just until moist.
Pour the batter into a 9-inch square metal baking pan coated with cooking spray. Bake at 375F for 15-20 minutes or until a wooden pick inserted in the center comes out clean. Cool cake in the pan 10 minutes on wire rack; remove from pan. Cool completely on wire rack. Serve with whipped topping, if desired. (Since the cake was so moist and tender, I found that it didn't even need a topping!)


See how tender that is?


Saturday, November 5, 2011

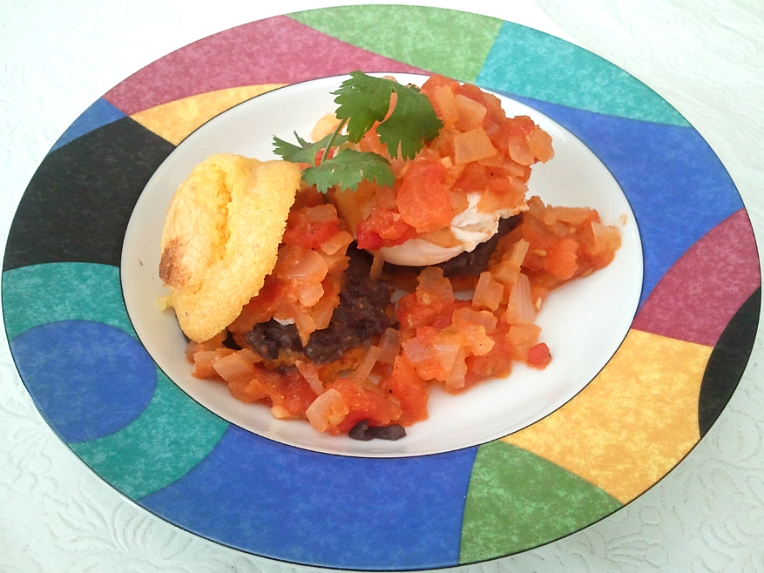
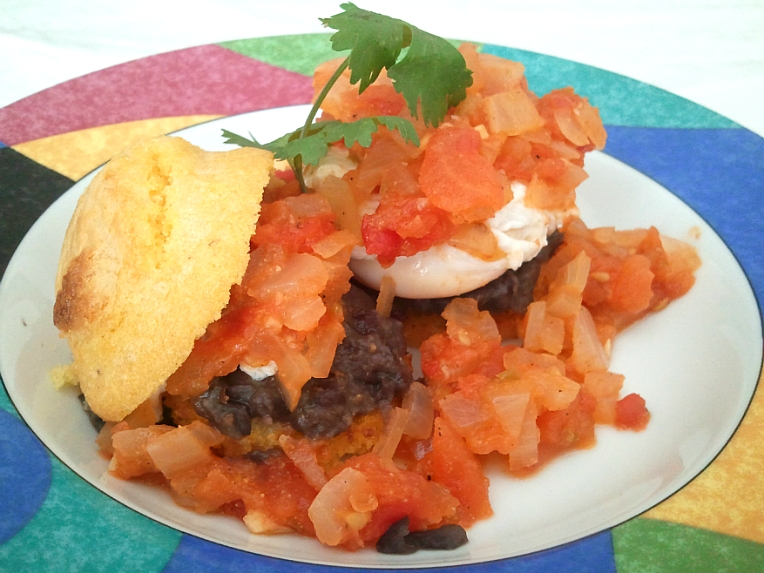
Benedict Rancheros


Mmm.. Mexican.. yum...:)))
Okay, so I love Mexican food, cilantro, and beans.
I was at costco, strolling along the aisles, and then I spotted a whole pack of canned black beans!
I picked it up immediately without hesitation.
....what was I thinking??
They've been in my pantry for like, 9 months now. 
My original plan was to use a can of beans once a week for 8 weeks, but those cans just ended up sitting there, forgotten.
Two of them were donated at the canned food drive last week, one of them was used for pasta, and the rest were simply heated and eaten by... me!
Of course, I still have a few cans left... and I don't think I would ever buy them in bulk again!
So anyway, this was something I made to clean my pantry, to be honest.
My family is usually not crazy about beans, but they all loved this dish!
Just smuggling in some good ol' beans for my family:) 
They ARE meant to be good for you, right?


Benedict Rancheros
serves 2
Recipe adapted from Epicurious
Ingredients:
1 jalapeno
1 tsp olive oil
1 small onion, chopped
1 clove garlic, chopped
1/2 tsp cumin
1 cup crushed tomatoes with juice
1/2 cup water, plus more as needed
2 eggs
black pepper & sea salt
1 Tbsp finely chopped cilantro*
1/2 cup canned black beans, drained
1/2 cup water
2 corn muffins (recipe below)

Directions:
Cut jalapeno in half lengthwise. Scrape the seeds and reserve them for later use, and finely chop the flesh.
Heat oil on a skillet over medium heat and cook the jalapeno, onion, garlic, and cumin for 4-6 minutes.
Add the tomatoes and 1/2 cup water, bring to a boil, then simmer over medium low heat until it becomes a sauce-like consistency.**
Poach the eggs and keep warm in 120F water.
Taste the sauce, season, and add the reserved jalapeno seeds if you want it spicier. (I didn't add the seeds, and it was  mild to medium spicy). Stir in the cilantro, cover, and remove from heat.
Pour the beans and water into another skillet over medium heat, mash with a fork, then cook until thickened, about 3-4 minutes. Add water as needed.
Cut the rounded tops of the corn muffins and cut the bottom in half horizontally. Toast under a broiler, cut side up, until golden brown. Put the muffin on a serving plate, spread the beans, top with a poached egg, then the vegetable tomato mixture. Garnish with cilantro, if desired.

Notes:
*I forgot to stir in the cilantro in the salsa, so I simply used it as a garnish at the very end!
**I had to simmer for a LONG time until it thickened even the slightest bit. The tomatoes were very watery:( I would use just 1/4 cup of water next time.

Corn Muffins:
Recipe adapted from Betty Crocker's New Cookbook
Ingredients:
3/4 cup yellow cornmeal
1/4 cup all purpose flour
3/4 cup buttermilk
2 tbsp vegetable oil or shortening
1/2 tsp sugar
1/2 tsp salt
1/4 tsp baking soda
1 large egg

Directions:
Preheat the oven to 450F. Grease the bottom and side of 6 muffin cups with shortening.
Mix all ingredients. Beat vigorously 30 seconds with a wooden spoon. Pour batter into muffin cups.
Bake for 10-15 minutes, until golden brown.